Loading... ### 第一步导入坐标:(pom.xml) ```java <!--thymeleaf--> <dependency> <groupId>org.springframework.boot</groupId> <artifactId>spring-boot-starter-thymeleaf</artifactId> </dependency> <dependency> <groupId>ognl</groupId> <artifactId>ognl</artifactId> <version>3.1.26</version> </dependency> ``` ### 配置文件:(application.properties) ```java # 应用名称 spring.application.name=thymeleaf_01_helloword # THYMELEAF (ThymeleafAutoConfiguration) # 开启模板缓存(默认值: true ) spring.thymeleaf.cache=false # 检查模板是否存在,然后再呈现 spring.thymeleaf.check-template=true # 检查模板位置是否正确(默认值 :true ) spring.thymeleaf.check-template-location=true #Content-Type 的值(默认值: text/html ) spring.thymeleaf.content-type=text/html # 开启 MVC Thymeleaf 视图解析(默认值: true ) spring.thymeleaf.enabled=true # 模板编码 spring.thymeleaf.encoding=UTF-8 # 要被排除在解析之外的视图名称列表,⽤逗号分隔 spring.thymeleaf.excluded-view-names= # 要运⽤于模板之上的模板模式。另⻅ StandardTemplate-ModeHandlers( 默认值: HTML5) spring.thymeleaf.mode=HTML5 # 在构建 URL 时添加到视图名称前的前缀(默认值: classpath:/templates/ ) spring.thymeleaf.prefix=classpath:/templates/ # 在构建 URL 时添加到视图名称后的后缀(默认值: .html ) spring.thymeleaf.suffix=.html ``` ### 核心代码: ```java @Test public void test01(){ // 创建模板引擎 final TemplateEngine engine = new TemplateEngine(); // 读取磁盘中的模板文件 final ClassLoaderTemplateResolver resolver = new ClassLoaderTemplateResolver(); // 设置引擎使用 resolver engine.setTemplateResolver(resolver); // 指定数据 final Context context = new Context(); context.setVariable("code", "1234"); // 处理模板 final String html = engine.process("template.html", context); System.out.println(html); } ``` ### html所在目录: 在resources目录下 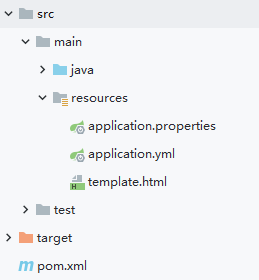 ### html代码: ```html <!DOCTYPE html> <html lang="en"> <head> <meta charset="UTF-8"> <title>Title</title> </head> <body> <!--可以把从java中的变量解析到code中--> <p th:text="${code}"></p> </body> </html> ``` 最后修改:2022 年 08 月 21 日 © 允许规范转载 打赏 赞赏作者 支付宝微信 赞 1 如果文章有用,请随意打赏。